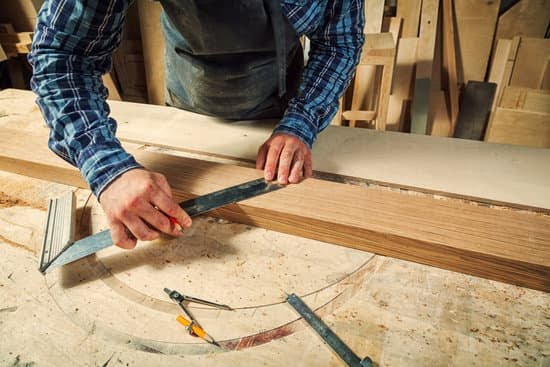
Are you passionate about woodworking and looking to take your skills to the next level? Building your own DIY woodworking table saw could be just the project for you.
In this article, we will explore all aspects of creating your own table saw, from choosing the right materials to customizing it for maximum efficiency. Whether you’re a seasoned woodworker or just starting out, this guide will provide all the information you need to successfully build and use your very own table saw.
When it comes to DIY woodworking, having a reliable and well-built table saw is essential. The right table saw can make a world of difference in the quality of your work and the ease of completing projects.
By taking on the challenge of building your own table saw, you not only save money but also gain valuable experience in customizing tools to suit your specific needs. With the right guidance and know-how, constructing a DIY woodworking table saw can be an incredibly rewarding and fulfilling endeavor.
Throughout this article, we will delve into various aspects of constructing and using a DIY woodworking table saw. From safety precautions and tips for using a table saw to expert tricks for success, we have you covered. Follow along as we provide step-by-step instructions, highlight essential tools and equipment needed, offer maintenance tips, and showcase inspirational projects to get your creativity flowing in the world of DIY woodworking.
Choosing the Right Materials for Your Table Saw Project
When embarking on a DIY woodworking table saw project, choosing the right materials is crucial for the success and safety of your endeavor. Here are some tips to help you select the best materials for your table saw project:
1. Quality of Wood: The type and quality of wood you choose will impact the overall performance and durability of your table saw. Opt for high-quality, stable hardwood such as oak, maple, or birch for the table saw top and fence. These woods are known for their strength and resistance to warping, ensuring a reliable work surface for your table saw.
2. Metal Components: When it comes to metal components such as miter gauges, rip fences, and blade guards, it’s important to select sturdy materials that can withstand the constant friction and pressure of woodworking. Look for steel or aluminum that has been properly treated to resist corrosion and wear over time.
3. Fasteners and Hardware: Using the right fasteners and hardware is essential in ensuring the stability and safety of your DIY woodworking table saw. Look for high-quality screws, nuts, bolts, and washers that are specifically designed for woodworking applications. Consider investing in stainless steel hardware to prevent rusting.
By carefully selecting high-quality wood, metal components, and fasteners for your DIY woodworking table saw project, you can ensure a sturdy, durable, and safe tool that will enhance your woodworking experience.Keyword: diy woodworking table saw.
Safety Precautions and Tips for Using a Table Saw
When it comes to using a table saw, safety should always be the top priority. Whether you are an experienced woodworker or just starting out with your DIY woodworking table saw, following these safety precautions and tips can help prevent accidents and ensure a smooth and successful woodworking experience.
First and foremost, it is crucial to wear appropriate safety gear when using a table saw. This includes safety goggles to protect your eyes from flying debris, ear protection to guard against loud noise, and gloves to provide a better grip on the wood and protect your hands from sharp edges. Additionally, avoid wearing loose clothing or jewelry that could get caught in the saw.
Another important safety measure is to always use push sticks or push blocks when cutting small pieces of wood. This keeps your hands at a safe distance from the saw blade and reduces the risk of injury. When making cuts, make sure that the fence is properly aligned with the blade and never reach over or behind the saw blade while it is running.
It’s also essential to keep your work area clean and well-organized to avoid potential hazards. Make sure there are no obstructions that could cause trips or falls, and always unplug the table saw when not in use. By following these safety precautions and tips, you can enjoy working with your DIY woodworking table saw while minimizing the risk of accidents.
| Safety Precautions | Tips for Using a Table Saw |
|---|---|
| Wear appropriate safety gear | Use push sticks or push blocks |
| Keep work area clean | Ensure fence alignment with blade |
Step-by-Step Guide to Building Your Own Table Saw
Building your own table saw can be a rewarding and cost-effective project for any DIY woodworking enthusiast. With the right materials, tools, and attention to detail, you can create a functional and efficient table saw that meets your specific needs. Here’s a step-by-step guide to help you get started on building your own DIY woodworking table saw:
1. Design and Planning: Before you start building your table saw, it’s essential to have a clear design and plan in place. Consider factors such as the size of the table, the type of blade you’ll be using, the motor power, and safety features. Take measurements and sketch out a detailed plan for reference.
2. Gather Materials: The next step is to gather all the necessary materials for your DIY woodworking table saw project. This includes plywood or MDF for the tabletop, sturdy metal or wooden legs for support, angle iron for the fence rails, and a quality motor with proper horsepower for cutting through wood.
3. Assemble the Frame: Start by constructing the frame of your table saw using the chosen materials. This will provide stability and support for the tabletop and other components of the saw. Use heavy-duty screws or bolts to secure everything together.
4. Install Motor and Blade: Once the frame is assembled, it’s time to install the motor and blade mechanism. Ensure that the motor is securely attached to the frame and aligns properly with the blade assembly. Double-check all connections and wiring for safety.
5. Add Safety Features: Safety should be a top priority when building your DIY woodworking table saw. Consider adding features such as blade guards, kickback pawls, emergency shut-off switches, and a well-designed fence system to prevent accidents while working with the saw.
By following these steps and exercising patience and precision during each phase of construction, you can create a reliable DIY woodworking table saw that will serve you well in various woodworking projects.
Remember to always prioritize safety when using power tools like your newly built DIY woodworking table saw by wearing appropriate protective gear including goggles or masks.
Essential Tools and Equipment Needed for DIY Woodworking Table Saw
Building your own DIY woodworking table saw requires several essential tools and equipment to ensure the success of your project. Whether you are a beginner or an experienced woodworker, having the right tools is crucial for creating a functional and reliable table saw.
One of the most important tools you will need is a circular saw, which will serve as the main cutting component for your DIY table saw. Additionally, you will need a sturdy and stable workbench or table to mount your table saw on. This will provide a safe and secure working surface for all your woodworking projects. A quality miter gauge is also necessary to ensure accurate and precise cutting angles.
In addition to these key tools, it is important to have safety equipment such as safety goggles, hearing protection, and a dust mask to protect yourself from potential hazards while using your DIY woodworking table saw. Additionally, having the right measuring and marking tools such as a tape measure, square, and marking pencil will help you make accurate cuts and measurements for your projects.
Lastly, having proper storage solutions for your tools and equipment is essential for keeping your workspace organized and efficient.
Ultimately, having the right tools and equipment for building a DIY woodworking table saw will not only make the construction process easier but also contribute to the overall safety and efficiency of your projects. By investing in quality tools and ensuring that you have all the necessary equipment, you can set yourself up for success in creating a customized table saw tailored to your specific woodworking needs.
Customizing Your Table Saw for Maximum Efficiency
Once you have built your DIY woodworking table saw, you may want to consider customizing it to maximize its efficiency and functionality. There are various ways to customize your table saw, from adding extensions to the table to installing a better blade guard or rip fence. These customizations can make your table saw more versatile and easier to use for a wider range of woodworking projects.
One popular customization for a DIY woodworking table saw is adding an outfeed table extension. This provides additional support for longer pieces of wood as they come off the saw, reducing the risk of kickback and making the cutting process safer and more accurate. Another common customization is replacing the standard miter gauge with a higher quality one that allows for more precise angle cuts.
In addition to these physical customizations, there are also modifications that can be made to improve dust collection and overall safety of the table saw. Installing a dust collection system or upgrading the existing one can help keep your workspace clean and reduce health risks associated with wood dust. Adding advanced safety features such as riving knives or flesh-sensing technology can also enhance the safety of your DIY woodworking table saw.
| Customization | Effect |
|---|---|
| Outfeed table extension | Provides additional support for longer pieces of wood, reduces kickback, and makes cutting process safer and more accurate. |
| Upgrading miter gauge | Allows for more precise angle cuts. |
| Dust collection system | Keeps workspace clean and reduces health risks associated with wood dust. |
Maintenance and Care for Your DIY Woodworking Table Saw
Regular Cleaning and Inspection
One of the most important aspects of maintaining your DIY woodworking table saw is regular cleaning and inspection. After each use, it’s essential to clean off any sawdust, dirt, and debris that may have accumulated on the saw. This helps prevent buildup and ensures that your table saw continues to function smoothly. Additionally, take the time to inspect the blade, fence, miter gauge, and other components for any signs of wear or damage.
Blade Maintenance
The blade is arguably the most critical component of your table saw, so it’s crucial to keep it in top condition. Regularly inspect the blade for any signs of dullness or damage. If necessary, sharpen or replace the blade to ensure clean and precise cuts.
It’s also important to check for any resin buildup on the blade, as this can impact its performance. Properly lubricating the blade and keeping it clean will extend its lifespan and maintain cutting efficiency.
Alignment and Calibration
To ensure accurate cuts with your DIY woodworking table saw, regular alignment and calibration are essential. Check the alignment of the blade with the miter slots and fence regularly, as even slight misalignments can compromise the quality of your cuts. Moreover, make sure that the bevel stops are properly calibrated for accurate bevel cuts. Taking the time to maintain proper alignment and calibration will result in better woodworking outcomes with your table saw.
By following these maintenance tips for your DIY woodworking table saw, you can prolong its lifespan and ensure optimal performance for all your woodworking projects. Regular cleaning, blade maintenance, and aligning/calibrating components will contribute to a reliable and efficient table saw that enhances your woodworking experience.
Inspirational Table Saw Woodworking Projects
Are you looking for inspiration for your next woodworking project using your DIY woodworking table saw? Look no further. There are countless projects that you can take on with the use of your custom-made table saw. Whether you are a beginner or an experienced woodworker, there are projects that can challenge and excite you.
Small Wooden Furniture
One of the most popular projects that woodworkers take on using a table saw is creating small wooden furniture pieces. This can include anything from end tables and coffee tables to chairs and benches. With the precision and control offered by a well-built table saw, you can create intricate joints and designs that will enhance the beauty of your furniture pieces.
Home Decor Items
Another great option for table saw woodworking projects is creating home decor items such as picture frames, shelves, and wall art. You can experiment with different types of wood, finishes, and designs to create unique pieces that will add a personal touch to your home decor.
Custom Cabinetry
For those looking for a more challenging and rewarding project, custom cabinetry is an excellent option. With the use of your DIY woodworking table saw, you can create custom cabinets for your kitchen, bathroom, or any other space in your home. The precision and accuracy of a well-calibrated table saw will ensure that each piece fits perfectly together for a professional-looking result.
These are just a few examples of the many inspirational woodworking projects that you can take on with your DIY woodworking table saw. Get creative, challenge yourself, and enjoy the satisfaction of creating beautiful pieces with this versatile tool.
Expert Tips and Tricks for DIY Woodworking Table Saw Success
In conclusion, building your own DIY woodworking table saw can be a rewarding and cost-effective project for any woodworking enthusiast. With the right materials, tools, and safety precautions in place, you can create a customized table saw that fits your specific needs and maximizes efficiency in your woodworking projects. By following the step-by-step guide provided in this article, along with expert tips and tricks, you can ensure the success of your DIY table saw project.
One of the most important aspects of creating your own table saw is choosing the right materials. This will not only determine the durability and stability of your finished product but also contribute to its overall performance.
Additionally, understanding safety precautions and tips for using a table saw is crucial to prevent accidents and ensure a safe working environment. By customizing your table saw to fit your unique requirements and regularly maintaining it, you can prolong its lifespan and make it an indispensable tool in your woodworking arsenal.
Lastly, exploring inspirational table saw woodworking projects can provide valuable ideas for putting your DIY woodworking table saw to good use. Whether you’re a beginner or an experienced woodworker, incorporating expert tips and tricks into your DIY woodworking endeavors will help you achieve the best results with your homemade table saw.
With dedication, patience, and attention to detail, you can confidently take on this rewarding project and enjoy the benefits of having a personalized table saw that enhances your woodworking experience.
Frequently Asked Questions
What Is a Good DIY Table Saw?
A good DIY table saw should be durable, accurate, and versatile. Look for one with a powerful motor, adjustable fence, and safety features. Consider the size of your projects and your budget when choosing a DIY table saw.
What Can I Use if I Don’t Have a Table Saw?
If you don’t have a table saw, you can use alternative tools like a circular saw, jigsaw, or hand saw to cut wood. Each tool has its own strengths and limitations, so choose the one that best suits your project’s needs.
What Saw Is Best for Wood DIY?
The best saw for wood DIY projects depends on the specific task at hand. A miter saw is great for making angled cuts, while a band saw is useful for intricate curved cuts.
For general-purpose woodworking, a circular saw or table saw is often the most versatile choice. Consider the type of cuts you need to make before selecting the best saw for your wood DIY project.

Hi everyone! I’m a woodworker and blogger, and this is my woodworking blog. In my blog, I share tips and tricks for woodworkers of all skill levels, as well as project ideas that you can try yourself.


