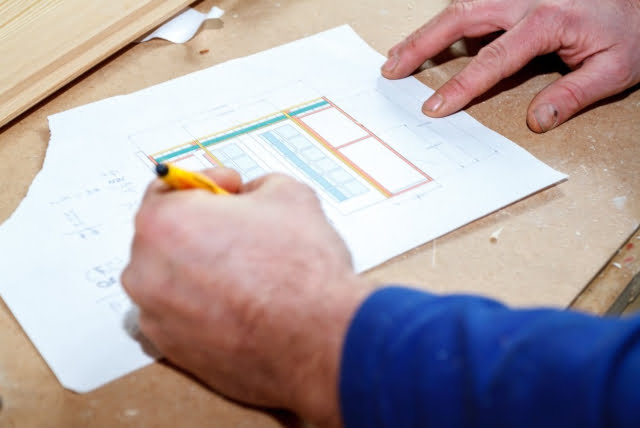
Have you ever wondered how to make a woodworking drawing? Woodworking drawings are an essential aspect of any woodworking project, as they provide a visual representation of the final product and serve as a crucial tool for project planning and execution. In this article, we will explore the importance of woodworking drawings and how they aid in the successful completion of woodworking projects.
Woodworking drawings not only help in conveying the design and construction details but also serve as a guide for material estimation, cost calculation, and workflow planning. Whether you are new to woodworking or an experienced woodworker, mastering the skill of creating detailed and accurate woodworking drawings is essential for bringing your project ideas to life.
In the following sections, we will delve into the tools and materials needed for making woodworking drawings, understanding woodworking measurements, sketching the basic design, adding technical details, using CAD software for woodworking drawing, tips for creating professional-quality drawings, and finalizing the woodworking drawing. By the end of this article, you will have all the knowledge and guidance necessary to create precise and detailed woodworking drawings for your next project.
Tools and Materials Needed
Woodworking drawing is an essential part of any woodworking project, as it serves as a visual representation of the design and details needed to bring the project to life. To create a woodworking drawing, you will need various tools and materials to ensure precision and accuracy in your sketches. Here is a comprehensive list of the essential tools and materials required for making a woodworking drawing.
Pencils
One of the most basic yet crucial tools needed for woodworking drawing is a set of high-quality pencils. Different lead hardness (H, HB, B) can be used for different types of lines, shading, and detailing in your drawing.
Rulers and Straightedges
Accurate measurements are vital in woodworking drawings, so having a variety of rulers and straightedges in different lengths and materials will help you create precise lines, angles, and dimensions.
Drafting Tools
Drafting tools such as compasses, protractors, T-squares, and French curves are indispensable for creating intricate details and accurate shapes in your woodworking drawings. These tools help maintain consistency and precision in your sketches.
Wood Samples
Having actual wood samples or samples of materials you plan to use in your project can greatly aid in understanding how different grains, textures, and colors will look on paper. It also helps visualize how joints and connections will come together in the final project.
Understanding Woodworking Measurements
When it comes to creating woodworking drawings, understanding the different types of measurements used in woodworking is crucial. Whether you are working on a simple DIY project or a more complex piece of furniture, accurate measurements are essential for ensuring that the final product meets your expectations. In this section, we will delve into the various types of measurements used in woodworking and provide guidance on how to accurately take and interpret them.
Types of Measurements
In woodworking, there are several types of measurements that are commonly used. These include scale measurements, dimensions, and angles. Scale measurements refer to the proportionate representation of an object’s size in relation to its actual size. Dimensions, on the other hand, involve specifying the length, width, and height of various components within a project. Lastly, angles play a critical role in determining how different pieces will fit together to form the final product.
Accurate Measurement Techniques
To ensure accurate measurements in woodworking drawing, it is essential to use the right tools and techniques. This includes using precision measuring tools such as rulers, squares, calipers, and protractors to take precise measurements. Additionally, understanding how wood behaves and making necessary adjustments for wood movement when taking measurements is crucial for achieving accuracy.
Interpreting Measurements
Interpreting measurements in woodworking drawing involves translating the measurement data into visual representations that accurately convey the intended design. This may include converting scale measurements into actual dimensions or ensuring that angles are correctly represented to facilitate construction later on. It’s important to have a clear understanding of how each measurement contributes to the overall design and functionality of the woodworking project.
Overall, understanding woodworking measurements is fundamental to creating detailed and precise woodworking drawings that serve as reliable guides for project execution. By mastering these measurement techniques and concepts, woodworkers can ensure that their projects are not only aesthetically pleasing but also structurally sound and functional.
Sketching the Basic Design
When creating a woodworking drawing, it is essential to start with sketching the basic design of the project. This step sets the foundation for the entire drawing and serves as a visual representation of the final product. Here is a step-by-step guide on how to sketch the basic design of a woodworking project:
1. Choose the Right Perspective: Before starting your sketch, decide on the perspective you want to present. Will it be a 2D front view, a 3D isometric projection, or a combination of different perspectives? Choosing the right perspective will help you accurately portray the details and dimensions of the project.
2. Determine Proportions: Once you have chosen the perspective, carefully determine the proportions of your woodworking project. Use measurements and scale calculations to ensure that your sketch accurately reflects the actual size and dimensions of the final product.
3. Adding Details: After outlining the basic shape and proportions, it’s time to add details to your sketch. Pay close attention to intricate features such as joinery, decorative elements, and any other crucial design aspects that need to be included in your woodworking drawing.
By following these steps, you can create a preliminary sketch that will serve as a detailed guide for further development of your woodworking drawing.
Now that you have sketched out the basic design of your woodworking project, you can move on to adding technical details and making sure that your drawing is professional-quality.
Adding Technical Details
When it comes to creating a woodworking drawing, adding technical details is essential for providing clear instructions for the construction of the project. One of the most important aspects of adding technical details is including information about joinery, which refers to the methods and techniques used to connect wood pieces together.
This can include details about dovetail joints, mortise and tenon joints, or other traditional woodworking joinery techniques. It is important to accurately represent these details in your drawing to ensure that the project comes together as intended.
In addition to joinery, including information about construction techniques is crucial for conveying how the woodworking project should be built. This can involve specifying the type of wood that should be used, the thickness of each piece, and any specific methods that should be employed during construction. Providing detailed information about construction techniques in your woodworking drawing helps both yourself and others understand how the project should be assembled.
Lastly, assembly instructions are an integral part of adding technical details to your woodworking drawing. These instructions outline the step-by-step process for putting together all the individual components of a woodworking project. Clear and concise assembly instructions ensure that anyone working on the project can understand how everything fits together and prevent potential confusion during construction.
| Woodworking Drawing | Joinery Techniques | Construction Techniques | Assembly Instructions |
|---|---|---|---|
| Accurate representation in drawing | Type of wood and thickness | Step-by-step process for assembly |
Using CAD Software for Woodworking Drawing
Computer-Aided Design (CAD) software has revolutionized the way woodworking drawings are created, offering numerous benefits for creating precise and detailed designs. One of the key advantages of using CAD software is the ability to make quick and accurate changes to the drawing, without the need to start from scratch. This can save a significant amount of time and effort, especially in complex woodworking projects where multiple revisions may be necessary.
In addition to time savings, CAD software also enables woodworkers to generate 3D models of their designs, providing a more realistic visualization of the final project. This not only helps in better understanding the spatial relationships between different components but also aids in identifying potential design flaws or interferences before production begins. Moreover, many CAD programs offer features for simulating the assembly process, which can be immensely helpful in planning and optimizing the construction sequence.
Another advantage of using CAD software for woodworking drawing is the precise measurement and scaling capabilities it offers. With built-in tools for accurate dimensioning and scaling, woodworkers can ensure that their drawings adhere to precise measurements required for their project. Furthermore, these programs often provide libraries of standard components and materials, allowing users to incorporate ready-made elements into their designs, saving both time and effort in creating detailed parts from scratch.
| Benefit | Description |
|---|---|
| Quick and Accurate Changes | Saves time and effort by allowing easy revisions without starting from scratch |
| 3D Modeling Capabilities | Enables realistic visualization and identification of design flaws before production begins |
| Precise Measurement and Scaling | Provides accurate dimensioning tools and libraries of standard components for detailed designs |
Tips for Creating Professional-Quality Drawings
When creating woodworking drawings, it is essential to strive for professional-quality results. This not only ensures that the final woodworking project is accurately executed but also enhances the overall presentation of the design. To achieve professional-quality drawings, there are several valuable tips and tricks that woodworkers can employ.
One valuable tip for creating professional-quality woodworking drawings is to avoid common mistakes. This includes ensuring that all measurements are accurate, dimensions are clearly labeled, and details such as joinery and construction techniques are correctly depicted. By meticulously checking for errors and inconsistencies, woodworkers can produce drawings that serve as reliable guides for their projects.
Another useful technique for achieving professional-quality woodworking drawings is to use templates and stencils. Templates can help in standardizing certain elements of the drawing, such as repetitive patterns or shapes, while stencils can assist in creating uniform and precise markings or symbols. Incorporating these tools into the drawing process can result in cleaner and more polished designs.
Enhancing the overall presentation of woodworking drawings is also crucial in achieving a professional look. This can be achieved by paying attention to details such as labeling, line weights, and shading to add depth and dimension to the drawing. Additionally, utilizing color accents or digital rendering techniques can further elevate the visual appeal of the drawing. By focusing on these aspects, woodworkers can create woodworking drawings that are not only functional but also visually impressive.
Finalizing the Woodworking Drawing
In conclusion, creating a woodworking drawing is an essential part of any woodworking project as it serves as a roadmap for planning and executing the project. By following the step-by-step process described in this guide, anyone can learn how to make a woodworking drawing with precision and accuracy. The tools and materials needed are easily accessible, and by understanding woodworking measurements and using CAD software, one can produce professional-quality drawings.
Reviewing and finalizing the woodworking drawing is crucial before moving on to the actual woodworking project. This involves checking for accuracy in measurements, dimensions, and angles to ensure that the drawing accurately represents the intended design. Making necessary revisions at this stage is important to address any mistakes or discrepancies that may have been overlooked during the initial sketching and detailing process.
Once the woodworking drawing has been thoroughly reviewed and revised, it is then ready for use in the actual woodworking project. With a finalized and accurate drawing in hand, woodworkers can proceed with confidence knowing that they have a clear blueprint to guide them through each step of their project. In summary, mastering the art of creating woodworking drawings is an invaluable skill that can greatly improve the efficiency and precision of any woodworking endeavor.
Frequently Asked Questions
How Do You Draw a Woodworking Plan?
Drawing a woodworking plan requires attention to detail and measurements. Begin by sketching the project from different angles, noting dimensions, materials, and joinery techniques. Ensure accuracy to guide the construction process effectively.
How Do I Start Woodworking From Scratch?
Starting woodworking from scratch involves learning about different wood types, tools, and safety precautions. Research basic woodworking skills and techniques, invest in essential tools, and start with simple projects to develop your skills gradually.
Is SketchUp Good for Woodworking?
SketchUp can be a useful tool for woodworking, as it allows for precise 3D modeling of projects before starting construction. It enables woodworkers to visualize their designs, make accurate measurements, and identify any potential issues before cutting into expensive materials.

Hi everyone! I’m a woodworker and blogger, and this is my woodworking blog. In my blog, I share tips and tricks for woodworkers of all skill levels, as well as project ideas that you can try yourself.


