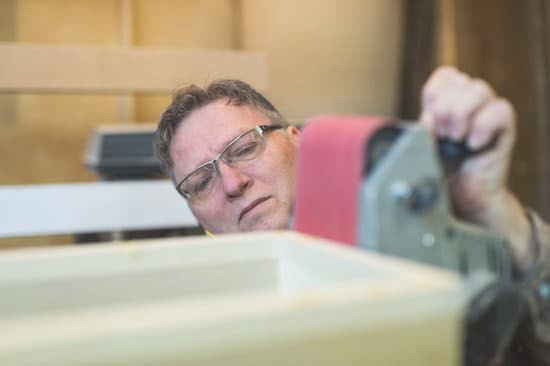
How do you polyurethane cupboards and woodwork? Polyurethane is a popular choice for finishing wooden surfaces, offering durability and protection. In this article, we will delve into the process of polyurethaning cupboards and woodwork, from understanding the basics of polyurethane to choosing the right finish and maintaining polyurethaned surfaces.
Polyurethane is a versatile and durable finish that provides excellent protection for wooden surfaces. In this section, we will explore what exactly polyurethane is, the different types available, and the benefits of using it on cupboards and woodwork. Understanding these basics will lay the foundation for successfully applying polyurethane to your surfaces.
Once you have a good grasp of what polyurethane is, the next step in the process is preparing the surface for application. This involves cleaning and sanding the surface, filling in any imperfections or cracks, and choosing the right products for preparation. Proper preparation is crucial for ensuring a smooth and long-lasting polyurethane finish on your cupboards and woodwork. We will discuss the essential steps to take in this preparation phase.
After preparing the surface, it’s time to apply the polyurethane. Whether you choose to brush it on or spray it on, there are tips for achieving a smooth and even application. We will also cover how many coats are needed for optimal protection and durability of your cupboards and woodwork. Understanding this application process is key to achieving a professional-looking finish on your surfaces.
Preparing the Surface
Cleaning and Sanding the Surface
Before applying polyurethane to cupboards and woodwork, it is crucial to prepare the surface properly. Start by cleaning the surface thoroughly to remove any dust, dirt, or grease that may affect the adhesion of the polyurethane. A solution of warm water and mild detergent can be used for this purpose. After cleaning, allow the surface to dry completely before moving on to sanding.
Sanding the surface is an important step in creating a smooth and even finish when using polyurethane. Use a medium-grit sandpaper to lightly sand the surface, removing any existing finish or rough patches. This will create a suitable texture for the polyurethane to adhere to.
Filling in Imperfections or Cracks
Inspect the cupboards and woodwork for any imperfections such as dents or cracks. These should be filled in with a suitable wood filler and sanded down until smooth before proceeding with polyurethane application.
Choosing the Right Products for Preparation
When preparing the surface for polyurethaning, it is important to choose products specifically designed for this purpose. This includes choosing a high-quality wood filler that matches the color of the wood and selecting appropriate sandpaper grits for efficient surface preparation.
By taking these steps to properly clean, sand, and repair any imperfections on your cupboards and woodwork, you will ensure that your polyurethane application goes smoothly and results in a beautiful and durable finish.
Applying the Polyurethane
Before applying polyurethane to cupboards and woodwork, it is essential to understand the proper application process. The first step in polyurethaning is to decide between brushing on or spraying on the product. Brushing on polyurethane allows for more control over the application, especially in hard-to-reach areas or intricate woodwork designs. On the other hand, spraying on polyurethane can provide a smoother finish and is often preferred for larger surfaces.
When applying polyurethane, it is important to follow a few tips for a smooth and even application. First, make sure to stir the polyurethane thoroughly before use to ensure an even consistency. It is also crucial to apply thin coats of polyurethane rather than thick layers, as this will help prevent drips and uneven drying. Additionally, always work in the direction of the wood grain to achieve a professional-looking finish.
The number of coats needed for optimal protection when polyurethaning cupboards and woodwork depends on the specific product used and the desired level of durability. In most cases, two to three coats of polyurethane are recommended for superior protection against wear and tear. However, always refer to the manufacturer’s guidelines for the particular product being used.
| Polyurethane Application Tips | Benefits |
|---|---|
| Stir polyurethane thoroughly before use | Prevents uneven drying |
| Apply thin coats in the direction of wood grain | Achieves a professional-looking finish |
| Refer to manufacturer’s guidelines for number of coats | Ensures optimal protection against wear and tear |
Choosing the Right Finish
When it comes to polyurethaning cupboards and woodwork, choosing the right finish is a crucial decision that will impact both the aesthetic and durability of the surfaces. There are typically three main options to consider: gloss, semi-gloss, and satin. Each finish has its own unique characteristics and benefits, so it’s important to weigh your options carefully.
Gloss finish provides a high sheen and reflects light, making it ideal for creating a dramatic and eye-catching look. However, it is also less forgiving when it comes to imperfections on the surface of the woodwork.
Semi-gloss offers a middle ground, providing some shine while still being more forgiving of flaws. On the other hand, satin finish has a subtle sheen that adds warmth to the wood without being too glossy, making it a popular choice for many homeowners.
To determine the best finish for your cupboards and woodwork, consider the existing decor and style of the room. If you have a modern or contemporary design, gloss or semi-gloss may be more suitable for achieving that sleek look. On the other hand, if you’re going for a more rustic or classic feel, satin might be the better option.
Ultimately, there is no one-size-fits-all answer when it comes to choosing a finish for polyurethaned surfaces. It’s essential to take into account your personal preferences as well as practical considerations such as maintenance and long-term durability.
| Finish Option | Description |
|---|---|
| Gloss | Provides high sheen but less forgiving of imperfections |
| Semi-Gloss | Middle ground between shine and forgiveness of flaws |
| Satin | Subtle sheen that adds warmth without excessive glossiness |
Drying and Curing Process
The drying and curing process is a crucial step in polyurethaning cupboards and woodwork. Understanding the timeline and necessary precautions can ensure that your surfaces are durable and long-lasting. Here are some important aspects to consider during this stage:
- Understanding the drying time of polyurethane: Depending on the type and brand of polyurethane used, the drying time can vary. In general, oil-based polyurethane takes longer to dry compared to water-based ones. It’s important to follow the manufacturer’s instructions regarding drying times.
- How long until the surface is fully cured and durable: While a polyurethaned surface may feel dry to the touch after a few hours, it takes longer for it to fully cure and become durable. It’s typically recommended to wait at least 24 hours before subjecting the surface to normal use.
However, full curing can take up to 30 days, so it’s best to avoid heavy use or placing objects on the surfaces during this period. - Precautions to take during the drying process: During the drying process, it’s essential to protect the surfaces from dust, dirt, and pet hair. Additionally, proper ventilation is important to aid in the evaporation of solvents and ensure that no bubbles or imperfections form on the surface.
Taking these factors into account will help you achieve a beautifully polyurethaned finish on your cupboards and woodwork that is not only aesthetically pleasing but also highly durable.
While some people may be inclined towards DIY solutions when it comes to home improvement ventures such as polyurethaning, hiring a professional for this task has its own set of advantages. Professional services guarantee expertise and precision in application which might be difficult for beginners. Moreover, professionals have access to high-quality equipment which ensures efficient work.
When considering whether or not to hire a professional or opt for a DIY approach, homeowners should weigh their level of experience with similar projects along with time constraints and overall budget. No matter what you choose, ensuring that cupboards are properly installed will create an integral part of making larger home improvement choices.
Maintaining Polyurethaned Surfaces
Cleaning and Caring for Your Newly Polyurethaned Cupboards and Woodwork
After successfully polyurethaning your cupboards and woodwork, it is essential to understand how to properly clean and care for these surfaces. For routine cleaning, use a mild soap and water solution with a soft cloth to wipe down the polyurethaned surfaces. Avoid harsh chemicals and abrasive scrubbers as they can damage the finish. Additionally, regularly dusting the surfaces with a soft microfiber cloth will help maintain their luster.
Preventing Scratches and Damage
To prevent scratches and damage on your newly polyurethaned cupboards and woodwork, consider using felt pads or coasters under decorative items or heavy objects that may come in contact with the surfaces. When handling sharp objects or tools near polyurethaned areas, be extra cautious to avoid inadvertently causing scratches. It’s also important not to place hot pans or dishes directly onto polyurethaned surfaces to prevent heat damage.
Products and Methods for Long-Term Maintenance
In addition to regular cleaning and preventative measures, there are products specifically designed for long-term maintenance of polyurethaned surfaces. Furniture polishes formulated for use on polyurethane finishes can help enhance shine and provide an added layer of protection against wear and tear. It’s important to follow the manufacturer’s instructions when using these products to ensure they are compatible with the specific type of polyurethane used on your cupboards and woodwork.
By following these maintenance tips, you can prolong the lifespan of your polyurethaned cupboards and woodwork while keeping them looking their best for years to come.
Troubleshooting Common Issues
The polyurethaning process, while offering numerous benefits for cupboards and woodwork, can sometimes come with its own set of challenges. It is not uncommon to encounter issues such as brush strokes, bubbles, or uneven application during the polyurethane application. When these issues arise, it is important to know how to troubleshoot and address them effectively.
One common issue that may arise when polyurethaning cupboards and woodwork is the appearance of brush strokes on the surface. This can detract from the overall aesthetic of the finished product. To address this problem, consider using a foam brush or a high-quality bristle brush specifically designed for polyurethane application. Additionally, ensuring that the brush strokes are applied in the direction of the wood grain can help minimize their visibility.
Bubbles forming on the surface during polyurethane application can also be a concern. To prevent this issue, it is essential to properly mix and strain the polyurethane before applying it. Additionally, applying thin coats of polyurethane and allowing ample drying time between coats can help minimize the likelihood of bubbles forming.
Uneven application of polyurethane can result in an inconsistent finish on cupboards and woodwork. To address this issue, ensure that the surface has been properly prepared and cleaned before applying the polyurethane. Using even brush strokes or a high-quality spraying technique can also help achieve a more uniform coat. If uneven application does occur, lightly sanding the surface between coats and applying an additional coat of polyurethane may help to create a smoother finish.
It’s essential to pay attention to these troubleshooting tips when encountering common issues during your polyurethaning process, as they will ensure that your cupboards and woodwork receive a professional-looking finish that will last for years to come.
Professional vs DIY Polyurethaning
In conclusion, polyurethaning cupboards and woodwork can be a rewarding process that adds beauty and durability to your home. Understanding polyurethane and its various types is essential in determining the best product for your specific needs.
Properly preparing the surface by cleaning, sanding, and filling imperfections is crucial to achieving a smooth and flawless finish. When applying the polyurethane, whether you choose to brush or spray it on, it’s important to follow the recommended number of coats for optimal protection.
Choosing the right finish for your cupboards and woodwork depends on your personal preference as well as the existing decor and style of the room. Whether you opt for a gloss, semi-gloss, or satin finish, each has its own unique benefits. It’s important to consider the drying and curing process of polyurethane, as well as taking precautions during this time to ensure a durable final result.
Once your surfaces are polyurethaned, proper maintenance is key to preserving their beauty and integrity. Knowing how to clean and care for polyurethaned surfaces will help prevent scratches and damage over time.
Additionally, being aware of common issues that may arise during the polyurethaning process will allow you to troubleshoot and fix any problems that occur. Finally, when deciding between professional vs. DIY polyurethaning, it’s important to weigh the pros and cons as well as consider cost comparison before making a decision.
Frequently Asked Questions
What Is the Best Way to Apply Polyurethane to Cabinets?
The best way to apply polyurethane to cabinets is to start by sanding the surface lightly with fine-grit sandpaper and then cleaning it thoroughly. Next, use a high-quality bristle brush to apply thin, even coats of polyurethane, allowing each coat to dry completely before applying the next one.
Can You Put Polyurethane Directly on Wood?
Yes, you can put polyurethane directly on wood. However, it is important to prepare the wood surface properly by sanding it smooth and cleaning off any dust or debris before applying the polyurethane. This will ensure a smooth and even finish.
How Many Coats of Polyurethane on Kitchen Cabinets?
When applying polyurethane to kitchen cabinets, it is generally recommended to use 2-3 coats for optimal durability and protection. Allow each coat to dry completely before lightly sanding the surface and applying the next coat. This will help achieve a beautiful and long-lasting finish on your cabinets.

Hi everyone! I’m a woodworker and blogger, and this is my woodworking blog. In my blog, I share tips and tricks for woodworkers of all skill levels, as well as project ideas that you can try yourself.


