Understanding the importance of bracing corners in woodworking is essential for ensuring the stability and durability of your woodwork projects. Whether you are building a simple table or a complex cabinet, properly bracing the corners will help prevent warping, twisting, and other structural issues over time. In this article, we will explore the key steps and techniques involved in effectively bracing corners in woodworking.
Choosing the right materials for bracing corners is crucial for achieving strong and reliable joints. We will discuss the different types of wood that are suitable for bracing, as well as the fasteners and tools needed to secure the joints properly. Additionally, we will provide valuable insights into measuring and marking techniques to determine the proper angles and dimensions for bracing, as well as cutting and shaping methods for precision and accuracy.
Once the materials are prepared, we will delve into various joinery methods for bracing corners, such as mortise and tenon, half-lap joint, and more. Understanding these joinery techniques will be instrumental in creating sturdy and seamless connections at the corners of your woodworking projects. Furthermore, we will explore how to attach the bracing to the corners using gluing, clamping, and securing methods to ensure a tight fit and long-lasting bond.
Choosing the Right Materials for Bracing Corners
When it comes to bracing corners in woodworking, selecting the right materials is crucial for ensuring strength, durability, and a professional finish. The choice of wood types, fasteners, and tools will greatly impact the overall quality of the bracing. In this section, we will discuss the key considerations when choosing materials for bracing corners in woodworking.
Wood Types
The type of wood used for bracing corners plays a significant role in its structural integrity and aesthetic appeal. Hardwoods such as oak, maple, and cherry are ideal choices for their strength and durability. Softwoods like pine and cedar may be suitable for lighter-duty applications but may require additional reinforcement. It’s important to select wood that complements the overall design of your project while also considering factors such as grain pattern, color, and workability.
Fasteners and Tools Needed
In addition to the wood itself, fasteners and tools are essential components when bracing corners in woodworking. Common fasteners include screws, nails, dowels, or specialized corner brackets. Each type of fastener has its own advantages and limitations in terms of strength, ease of installation, and visibility. As for tools, a combination of hand tools (e.g. chisels, saws) and power tools (e.g. drills, routers) may be required for cutting and shaping the bracing material.
Considerations for Bracing Materials
Before making any purchases or starting your project, consider the specific requirements of the corner bracing needed for your woodworking project. Factors such as load-bearing capacity, environmental conditions (e.g. indoor vs outdoor use), and design preferences should all be taken into account when selecting materials. By carefully considering these factors upfront, you can ensure that your chosen materials will result in sturdy and visually appealing corner bracing.
By understanding how to choose the right materials for bracing corners in woodworking projects – including wood types, fasteners, and necessary tools – you can set yourself up for success from the very beginning stages of your project.
Measuring and Marking
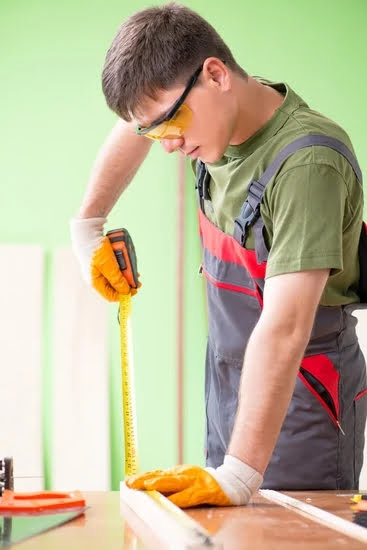
When it comes to woodworking, measuring and marking are crucial steps in determining the proper angles and dimensions for bracing corners. Whether you’re working on a simple shelf or a complex piece of furniture, precision is key to ensuring that the bracing fits perfectly and provides the necessary support. In this section, we’ll discuss the importance of accurate measurements and markings, as well as techniques for achieving the best results.
Importance of Accurate Measurements
Before you begin cutting or shaping your bracing material, it is essential to take precise measurements of the corners where the bracing will be installed. This includes determining the angle at which the bracing will be placed, as well as the length and width of the material needed. Using a combination square, protractor, or angle finder can help ensure that you achieve accurate measurements for your project.
Marking Techniques
Once you have determined the measurements for your bracing material, it’s time to mark out the areas where cuts will be made. Using a pencil or marking knife, transfer your measurement onto the wood with clear and precise marks. Pay close attention to any lines or angles that need to be cut into the material for proper fitting. Additionally, labeling each piece of bracing material can help prevent confusion during assembly.
Utilizing Templates and Jigs
For more complex projects or repetitive designs, creating templates or jigs can streamline the measuring and marking process. Templates allow you to easily transfer measurements onto multiple pieces of wood without having to measure each one individually. Similarly, jigs can help ensure that all your cuts are made at consistent angles and dimensions throughout your project, saving time and reducing potential errors.
By utilizing these tools and techniques for measuring and marking in woodworking projects, you can ensure that your braced corners fit seamlessly while providing optimal support for your finished piece.
Cutting and Shaping the Bracing Material
First, it’s important to choose the right cutting tools for the job. A miter saw or a table saw with a miter gauge can be used to make accurate crosscuts at the correct angles. Additionally, a coping saw or a band saw may be necessary for intricate or curved cuts, depending on the design of your project. The key is to use sharp blades and maintain proper safety measures while using these tools.
Once you have determined the angles and dimensions for your bracing material, carefully mark your measurements using a square, measuring tape, or protractor. Double-check your measurements before making any cuts to ensure precision. When cutting the material, always cut slightly outside of your marked lines to allow for refining with chisels or sanding later on.
Shaping the bracing material may involve using hand planes, chisels, or sanders to achieve smooth and precise edges that fit snugly against the adjoining pieces. Pay close attention to details such as grain direction when shaping wood, as this can affect stability and appearance. Take your time with this step, as accuracy in shaping is essential for successful corner bracing.
| Woodworking Tools | Usage |
|---|---|
| Miter Saw | To make accurate crosscuts at the correct angles. |
| Coping Saw or Band Saw | For intricate or curved cuts. |
| Square, Measuring Tape or Protractor | To mark measurements accurately. |
| Hand Planes, Chisels, Sanders | To achieve smooth and precise edges. |
Joinery Methods for Bracing Corners
When it comes to bracing corners in woodworking, joinery methods play a crucial role in ensuring the strength and durability of the finished piece. Whether you are working on furniture, cabinetry, or other wooden structures, selecting the right joinery method is essential. Here are some popular joinery methods for bracing corners:
- Mortise and Tenon: This traditional joinery method involves a mortise (square hole) being cut into one piece of wood and a tenon (protruding tongue) being created on another piece to fit into the mortise. The joint is then secured with glue or fasteners, resulting in a strong and durable connection.
- Half-Lap Joint: In this method, each of the two pieces being joined have half of the material removed so that they can overlap each other. The pieces are then glued together to create a flush and sturdy corner brace.
- Dovetail Joint: Known for its strength and decorative appeal, dovetail joints require precise cutting of interlocking “tails” and “pins.” These joints are commonly used in drawers and boxes where durability is essential.
These joinery methods require careful planning and execution to ensure that the braces provide adequate support to the corners of your woodworking project.
Understanding how to brace corners with different joinery methods can significantly impact the overall stability and appearance of your woodworking project. By mastering these techniques, woodworkers can create strong and visually appealing corner braces that enhance the structural integrity of their creations while adding a touch of craftsmanship.
Attaching the Bracing to the Corners
When it comes to woodworking, the process of bracing corners is essential for creating strong and durable structures. In this section, we will discuss the key steps involved in attaching the bracing to the corners of your woodworking project. This includes using appropriate gluing techniques, utilizing clamps effectively, and securing the joints for maximum strength and stability.
Gluing Techniques
One of the most common methods for attaching bracing to corners in woodworking is through the use of wood glue. It is important to choose a high-quality wood glue that is suitable for the type of wood you are working with. Apply a generous amount of glue evenly to both surfaces that will be joined together. Use a brush or roller to spread the glue if necessary, ensuring full coverage for a strong bond.
Clamping Methods
Once the glue has been applied, use clamps to secure the bracing in place while it dries. Choose clamps that are appropriate for the size and shape of your project, ensuring that they provide even pressure across the entire joint. Position the clamps carefully to ensure that the bracing remains in its intended position while drying. Be sure to wipe away any excess glue that squeezes out from the joint while clamping.
Securing Joints
In addition to gluing and clamping, securing the joints with fasteners such as screws or nails can provide added strength and stability. Pre-drill pilot holes before inserting screws or nails to prevent splitting or damaging the wood. Use a countersink bit if necessary to ensure that fasteners sit flush with the surface of the wood. Be mindful of proper placement and spacing when securing joints to ensure structural integrity.
By following these essential steps for attaching bracing to corners in woodworking, you can achieve solid and reliable joints that enhance the overall strength and quality of your projects.
Reinforcing and Finishing the Braced Corners
Once you have successfully attached the bracing to the corners of your woodworking project, it’s important to reinforce and finish the braced corners properly. This not only adds structural integrity to your piece but also enhances its aesthetic appeal. One of the key steps in this process is sanding the braced corners to ensure a smooth and even surface. Using high-grit sandpaper, carefully sand the corners until they are free of any rough edges or imperfections.
After sanding, you can then move on to staining the braced corners to achieve the desired color and finish for your woodworking project. Depending on the type of wood you are using and your personal preferences, there are various stain options available. Whether you want a natural wood look or a darker, more dramatic finish, be sure to apply the stain evenly and follow all manufacturer instructions for best results.
In addition to reinforcing and staining the braced corners, adding decorative elements can further elevate the overall appearance of your woodworking project. This could include intricate carvings, inlays, or other embellishments that highlight the craftsmanship of your work. These decorative touches can truly set your piece apart and showcase your skill as a woodworker.
| Woodworking Step | Description |
|---|---|
| Sanding | Use high-grit sandpaper to achieve a smooth surface on braced corners |
| Staining | Apply stain evenly for desired color and finish |
| Decorative Elements | Add intricate carvings or inlays to enhance visual appeal |
Tips and Tricks for Successful Corner Bracing
In conclusion, mastering the art of bracing corners in woodworking can greatly enhance the strength and aesthetic appeal of your projects. By understanding the importance of bracing corners and following the right techniques, you can achieve professional results and ensure the longevity of your creations.
Choosing the right materials for bracing corners is crucial to the success of your woodworking project. The type of wood, fasteners, and tools used can make a significant difference in the durability and appearance of the braced corners. Additionally, measuring and marking accurately, as well as cutting and shaping the bracing material with precision, are essential steps to achieving a seamless fit.
When it comes to joinery methods for bracing corners, there are various techniques to consider such as mortise and tenon joints or half-lap joints. Each method has its own advantages and it’s important to choose the one that will best suit your project. Finally, reinforcing and finishing the braced corners with sanding, staining, and adding decorative elements will not only add visual appeal but also provide extra protection against wear and tear.
By following these tips and tricks for successful corner bracing in woodworking, you will be better equipped to troubleshoot common issues and achieve professional results. With practice and attention to detail, you can elevate your woodworking skills and create pieces that are both functional and visually stunning. Whether you’re a beginner or an experienced woodworker, mastering the art of corner bracing will undoubtedly take your projects to the next level.

Hi everyone! I’m a woodworker and blogger, and this is my woodworking blog. In my blog, I share tips and tricks for woodworkers of all skill levels, as well as project ideas that you can try yourself.


