Are you looking to upgrade your bedroom furniture or add a new piece to your home? If so, learning how to build a dresser woodworking could be the perfect project for you. Building your own dresser not only allows you to have a customized piece of furniture that fits your specific needs and style, but it also offers a sense of accomplishment and satisfaction in creating something with your own hands.
When it comes to building your own dresser, there are several key factors to consider such as the type of wood to use, the tools and materials needed, customization options, and proper woodworking techniques. In this article, we will explore all these aspects in detail, providing you with a comprehensive guide on how to successfully build a dresser through woodworking.
Whether you are an experienced woodworker or just starting out, this article will provide helpful tips and tricks for smooth assembly, as well as common mistakes to avoid when building a dresser. By the end of this guide, you will have the knowledge and confidence to take on this DIY project and create a beautiful and functional dresser that will be a standout piece in your home.
So roll up your sleeves and get ready to tackle the exciting challenge of building your very own dresser through woodworking.
Choosing the Right Wood for the Project
Choosing the right wood is crucial when it comes to building a dresser through woodworking. The type of wood you choose will not only determine the overall look of your dresser but also its durability and longevity. Here are some factors to consider when selecting the perfect wood for your DIY dresser project:
Factors to Consider:
1. Durability: Consider the wear and tear your dresser will endure and choose a wood that can withstand it.
2. Aesthetic Appeal: Think about the style and color you want for your dresser and choose a wood that complements your vision.
3. Cost: Determine your budget for the project and find a wood option that fits within it.
Popular Wood Options:
- Maple: Known for its durability, maple is a popular choice for dressers due to its resistance to dings and scratches.
- Cherry: This hardwood is favored for its rich color and smooth grain, making it a classic choice for traditional furniture.
- Pine: For those on a tighter budget, pine offers a more affordable option while still providing a charming natural look.
- Walnut: A luxurious choice, walnut offers deep, rich tones and beautiful grain patterns, adding sophistication to any dresser.
When choosing the right wood for your dresser project, take into consideration these factors and explore various options before making your final decision.
With this information in mind, you are now ready to proceed to the next steps in building your very own custom-made dresser through woodworking.
Tools and Materials Needed for Dresser Woodworking
| Tools | Materials |
|---|---|
| Circular saw | Wood boards (i.e. pine, oak, maple) |
| Power drill | Screws and nails |
| Orbital sander | Wood glue |
| Jigsaw | Drawer slides |
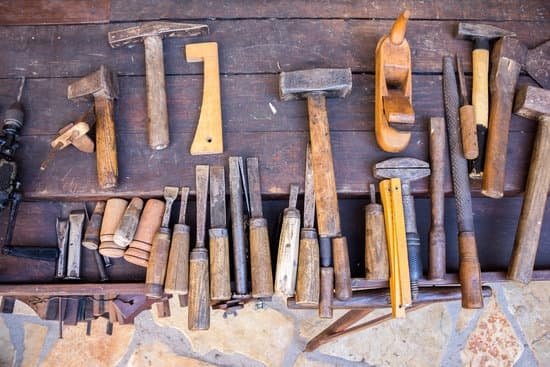
In addition to these tools and materials, it’s also important to have measuring tape, clamps, a hammer, safety goggles, and a dust mask for protection. As a beginner in woodworking projects like building a dresser, having the right tools on hand can make the process smoother and more manageable.
Before purchasing your wood for the dresser, consider the size of the dresser you plan to build. Commonly used wood options include pine, oak, and maple. Each type of wood has its own characteristics – from grain pattern to durability – so be sure to choose one that aligns with your preferences and budget.
Once you have all the necessary tools and materials ready, you’ll be better equipped to move on to the next stages of building your dresser through woodworking: planning and execution. Remember that taking the time to properly prepare will set you up for success in creating your own customized piece of furniture.
Step-by-Step Guide to Building a Dresser
Building your own dresser through woodworking can be a rewarding and fulfilling experience. Not only do you get to create a practical piece of furniture for your home, but you also have the opportunity to showcase your craftsmanship and creativity. In this section, we will provide a step-by-step guide to help you navigate the process of building a dresser from start to finish.
Before you begin the actual construction of your dresser, it’s important to plan out the project thoroughly. This includes determining the dimensions of the dresser, sketching out a design, and creating a cut list for the wood pieces needed. Planning ahead will save you time and reduce mistakes during the building process.
Once you have your plans in place, it’s time to gather your materials and tools. For a basic dresser woodworking project, you will need essential tools such as a circular saw, drill, sander, clamps, and measuring tape. As for materials, select high-quality wood that suits your style and budget. Popular options for dresser construction include pine, oak, maple, and cherry.
Now that you have everything prepared, it’s time to start building your dresser. Begin by cutting all the necessary wood pieces according to your cut list. Then, assemble the frame and drawers using proper joinery techniques such as dovetail joints or pocket hole screws. After assembly comes sanding, applying wood glue, finishing touches like drawer pulls and knobs installation.
| Wood Options | Popular Factors Consideration |
|---|---|
| Pine | Affordable and versatile |
| Maple | Durable with a smooth grain pattern |
| Oak | Strong and resistant to moisture” |
Customization Options
When it comes to building your own dresser, one of the most exciting aspects is the opportunity to add personal touches and unique features. This not only allows you to showcase your creativity, but also ensures that the finished product perfectly complements your style and needs. Here are some customization options to consider for your DIY dresser:
1. Hardware: One of the easiest ways to customize your dresser is by choosing unique hardware such as knobs, handles, or drawer pulls. Whether you prefer a rustic look with wrought iron hardware or a more modern feel with sleek metal handles, the options are endless. Consider browsing through specialty shops or online marketplaces for one-of-a-kind hardware that will set your dresser apart.
2. Design Elements: Incorporating design elements such as inlays, carvings, or decorative moldings can elevate the overall look of your dresser. These details can be as simple or intricate as you desire, and they have the power to turn a basic piece of furniture into a stunning focal point in any room.
3. Paint or Stain: The finish you choose for your dresser can completely transform its appearance. Whether you opt for a bold pop of color, a classic stain that showcases the natural beauty of the wood, or a distressed finish for a vintage vibe, the right choice can make all the difference.
By considering these customization options and incorporating them into your DIY dresser woodworking project, you can create a piece of furniture that is not only functional but also uniquely reflective of your personal style and preferences.
While building a dresser from scratch may seem like an intimidating task at first glance, breaking it down step by step makes it achievable even for beginners. With proper planning, tools, materials, and knowledge on how to build a dresser woodworking project successfully become within reach. By following these instructions carefully – whether adapting them verbatim or using them as inspiration – achieving success will become more tangible than ever before.
Tips and Tricks for Smooth Assembly and Proper Woodworking Techniques
Using the Right Tools and Equipment
Before you start building your dresser, it’s crucial to have the right tools and equipment for the job. Some essential tools include a saw, drill, measuring tape, sandpaper, clamps, wood glue, and a level. Having the right tools will make the construction process smoother and help you achieve accurate and precise results.
Proper Woodworking Techniques
When it comes to woodworking, precision is key. Make sure to measure twice and cut once to avoid costly mistakes. Additionally, always wear appropriate safety gear such as goggles and gloves when working with power tools. Take your time with each step of the process and pay attention to detail for a professional-looking end result.
Joinery Methods
There are various joinery methods you can use when building a dresser, including dovetail joints, rabbet joints, and dado joints. Each method has its own strengths and weaknesses, so it’s important to choose the one that best suits your skill level and design preferences. Research different joinery methods and practice them on scrap wood before working on your actual dresser project.
By utilizing these tips and techniques for smooth assembly and proper woodworking skills, you can ensure that your DIY dresser turns out beautifully crafted and durable. Taking the time to focus on precision and attention to detail will result in a high-quality piece of furniture that you can be proud of for years to come.
Common Mistakes to Avoid When Building a Dresser
Building a dresser through woodworking can be a rewarding and fulfilling experience, but it’s important to be aware of common mistakes that can occur during the process. By understanding these potential pitfalls and learning how to troubleshoot and problem-solve along the way, you can ensure a smoother and more successful DIY dresser project.
Improper Measurement and Planning
One of the most common mistakes when building a dresser is improper measurement and planning. This can lead to pieces that don’t fit together properly or are not aligned correctly. To avoid this, take your time with precise measurements and double-check your calculations before making any cuts. It’s also helpful to create a detailed plan or blueprint for your dresser before starting construction.
Using the Wrong Tools
Another mistake that can derail your dresser woodworking project is using the wrong tools for the job. Make sure you have all the necessary tools listed in the previous section and familiarize yourself with their proper use. Using improper tools can result in errors, damaged wood, or even safety hazards. Always use the right tool for the task at hand to ensure smooth assembly and professional results.
Skipping Proper Sanding and Finishing
Lastly, skipping proper sanding and finishing can detract from the overall appearance and durability of your DIY dresser. Neglecting this step can leave rough edges, uneven surfaces, or allow moisture to penetrate the wood over time. Take the time to sand all surfaces thoroughly before applying any finishing products such as varnish or paint. This will not only enhance the aesthetic appeal of your dresser but also protect it from wear and tear over the years.
By being aware of these common mistakes when building a dresser through woodworking, you can take proactive steps to avoid them and enjoy a more successful and satisfying outcome with your DIY project.
Finishing and Staining Your DIY Dresser
After completing the assembly of your DIY dresser, the next crucial step is finishing and staining. This will not only give your dresser a professional look, but it will also ensure long-lasting durability. The finishing process involves applying a protective coat to the wood, while staining adds color and enhances the natural beauty of the wood. By following the right techniques, you can achieve a flawless finish that will make your handmade dresser stand out.
Before starting the finishing process, it’s important to prepare the surface by sanding it thoroughly. Sanding helps to smooth out any rough spots and imperfections in the wood, ensuring an even application of the finish. Additionally, it’s essential to remove any dust or debris from the surface before proceeding with staining and finishing to prevent any blemishes on your dresser.
When choosing a finish for your dresser, consider factors such as its intended use and the desired appearance. A clear polyurethane finish provides strong protection against scratches and moisture, making it suitable for dressers that will be subjected to heavy use. On the other hand, an oil-based finish enhances the natural color of the wood while providing moderate protection. For a more eco-friendly option, you may consider using water-based finishes that offer low odor and easy cleanup.
Proper staining can greatly enhance the natural beauty of your dresser’s wood grain. Before applying stain, it’s important to test it on a small, inconspicuous area of the dresser to ensure that you achieve the desired color.
Once you have found the right stain, apply it evenly with a brush or cloth in long, smooth strokes along with grain of the wood. After allowing sufficient time for drying as per manufacturer’s recommendation, you can then apply multiple coats of finish for added protection and luster.
By following proper finishing and staining techniques as well as using high-quality materials, you can achieve professional results in enhancing your DIY dresser project. With attention to detail and patience throughout this important stage of construction,you will be able to enjoy your one-of-a-kind dresser for many years to come.
Conclusion
In conclusion, building your own dresser through woodworking can be a rewarding and fulfilling experience. Not only does it allow you to create a functional piece of furniture that meets your specific needs, but it also provides a sense of pride and accomplishment in showcasing your handmade creation. By following the step-by-step guide and utilizing the right tools, materials, and techniques, you can successfully build a dresser that reflects your personal style and complements your living space.
Furthermore, customizing your DIY dresser allows you to add unique features and personal touches that may not be found in store-bought furniture. Whether it’s adding intricate details to the drawers or choosing a stain color that perfectly matches your décor, the customization options are endless when it comes to building your own dresser. This level of personalization sets your handmade piece apart from mass-produced furniture and adds an extra layer of value to the finished product.
Lastly, finishing and staining your DIY dresser is essential for achieving a professional look and ensuring long-lasting durability. Taking the time to properly apply a finish not only enhances the natural beauty of the wood but also protects it from daily wear and tear.
With proper care and maintenance, your handmade dresser can become a cherished heirloom that is passed down for generations to come. Overall, embracing the process of building a dresser through woodworking allows you to create a one-of-a-kind piece that embodies craftsmanship, individuality, and functionality.
Frequently Asked Questions
Is It Cheaper to Build a Dresser?
Building a dresser can be cheaper if you already have the tools and materials needed. However, if you have to purchase everything, it may end up being more expensive than buying a pre-made dresser.
What Wood Do You Use to Build a Dresser?
The type of wood used to build a dresser often depends on personal preference and budget. Common woods used include pine, oak, cherry, and maple. Each type of wood has its own unique characteristics and price points.
Do You Need a Drill to Build a Dresser?
A drill is often necessary when building a dresser, especially when assembling the pieces together or adding hardware such as handles or knobs. It’s an essential tool that can make the construction process much easier and efficient.

Hi everyone! I’m a woodworker and blogger, and this is my woodworking blog. In my blog, I share tips and tricks for woodworkers of all skill levels, as well as project ideas that you can try yourself.


