Woodworking is a rewarding and fulfilling hobby, but achieving success in woodworking projects requires proper preparation of the wood. This begins with understanding the crucial process of milling and drying wood. In this article, we will delve into the essential steps for milling and drying wood for woodworking, providing valuable insights into selecting the right wood, techniques for milling, methods for drying, necessary tools and equipment, as well as tips for achieving successful results.
One of the fundamental aspects of woodworking is milling and drying wood to prepare it for use in various projects. Whether you are a beginner or an experienced woodworker, knowing how to properly mill and dry wood is key to achieving the best results in your woodworking endeavors. From selecting the right type of wood to understanding the effects of moisture content, every step in this process contributes to the quality and longevity of your finished products.
In this comprehensive guide, we will cover everything you need to know about milling and drying wood for woodworking. From choosing suitable types of wood for your projects to mastering techniques for cutting and shaping, as well as exploring different methods of drying wood, this article will equip you with the knowledge and skills necessary to succeed in your woodworking pursuits. So let’s dive in and learn how to mill and dry wood effectively for all your woodworking needs.
Selecting the Right Wood for Your Project
Selecting the right type of wood is crucial when it comes to milling and drying for woodworking projects. Different wood species have varying characteristics that can affect their suitability for milling and drying. Here are some types of wood that are commonly used in woodworking and are suitable for the milling and drying process:
- Oak: Known for its strength and durability, oak is a popular choice for furniture making and flooring. It mills well and dries relatively easily, making it a versatile option for various woodworking projects.
- Maple: With its distinct grain pattern and light color, maple is often used in cabinetry, musical instruments, and cutting boards. It machines well and takes finishes beautifully after proper drying.
- Walnut: prized for its rich, dark color and fine grain, walnut is often used in high-end furniture making. It mills smoothly and dries evenly with minimal risk of warping or splitting.
Each type of wood has its own unique characteristics when it comes to milling and drying, so it’s important to consider these factors when selecting the right wood for your project.
Understanding how to mill and dry wood for woodworking involves knowing which types of wood are most suitable for the process. By selecting the right type of wood, you can ensure better results in your woodworking projects as well as minimize potential issues during the milling and drying stages. By choosing suitable woods such as oak, maple, or walnut, you will set yourself up for success in your woodworking endeavors.
How to Properly Mill Wood
Wood milling is a crucial step in woodworking, as it involves cutting and shaping raw wood into the desired dimensions and profiles for various projects. The proper techniques for milling wood are essential to ensure that the final pieces are accurate, smooth, and free from defects. In this section, we will discuss the key steps and techniques involved in properly milling wood for woodworking projects.
One of the first steps in milling wood for woodworking is selecting the right type of wood for your project. Different woods have varying hardness, grain patterns, and workability, so it’s important to choose a species that is suitable for your specific needs.
Once you’ve selected the wood, the next step is to prepare it by squaring off the edges and faces before any actual shaping or cutting takes place. This process helps ensure that the wood pieces are uniform in size and can be accurately shaped according to your project requirements.
When it comes to cutting and shaping wood, there are several tools and techniques that can be used. Traditional methods include using hand planes, chisels, and saws to create intricate details and smooth surfaces. However, modern woodworking also employs power tools such as jointers, planers, table saws, and routers to efficiently mill wood with precision.
Lastly, proper attention must be given to safety when milling wood for woodworking projects. Sharp tools must be used carefully and proper eye protection should always be worn. Additionally, it’s important to understand how different grains of wood may affect cutting techniques to avoid tear-out or splintering.
The Importance of Drying Wood
Wood undergoes various changes depending on its moisture content, making the drying process a crucial step in woodworking. Understanding the effects of moisture content on wood is essential for ensuring the quality and longevity of your woodworking projects.
Effects of Moisture Content on Wood
The moisture content of wood significantly affects its dimensional stability, strength, and workability. With a high moisture content, wood is more prone to warping, shrinking, and developing mold or rot. On the other hand, wood with low moisture content may become brittle and difficult to work with. It is crucial to strike a balance by properly drying the wood to achieve optimal moisture content for woodworking.
Benefits of Properly Dried Wood
Properly dried wood offers numerous benefits for woodworking projects. It ensures that the finished piece will maintain its shape and structural integrity over time, reducing the risk of cracking or warping. Additionally, dry wood allows for better adhesion when using finishes or glues and produces a higher quality final product overall.
Dangers of Improperly Dried Wood
Using improperly dried wood in woodworking projects can lead to various issues such as joints coming apart, uneven surfaces, and structural instability. Additionally, if the moisture content is too high, it can lead to mold growth or decay over time. Therefore, understanding the effects of moisture content on wood is crucial for achieving success in woodworking projects.
In consideration of these effects and benefits associated with the proper drying of wood in woodworking projects validate how important it is to understand this aspect thoroughly in order to conduct successful milling procedures for woodworking projects.
Methods for Drying Wood
When it comes to woodworking, the proper drying of wood is crucial to the success of any project. The moisture content of the wood can greatly impact its stability and durability, making it important to understand the different methods for drying wood. Two common methods for drying wood are air-drying and kiln-drying, each with their own benefits and drawbacks.
Air-drying wood is a traditional method that involves stacking and storing lumber in a well-ventilated area. This allows the natural airflow to gradually reduce the moisture content of the wood over time. While air-drying may take longer than kiln-drying, it is a cost-effective option that can produce high-quality results. Additionally, air-dried wood tends to develop fewer internal stresses and can have more vibrant colors due to the slower drying process.
On the other hand, kiln-drying involves using a controlled environment and heat to rapidly reduce the moisture content of the wood. This method provides a faster turnaround time compared to air-drying, making it ideal for commercial woodworking operations with strict deadlines. Kiln-dried wood also tends to have more uniform moisture levels throughout the lumber, reducing the risk of warping or cracking.
In summary, both air-drying and kiln-drying have their advantages depending on the specific needs of your woodworking project. Understanding how to properly dry wood using these methods will not only ensure better quality results but also contribute to the overall success of your woodworking endeavors. With this knowledge, you can confidently select the appropriate drying method for your specific project requirements.
Tools and Equipment Needed for Milling and Drying Wood
When it comes to milling and drying wood for woodworking projects, having the right tools and equipment is crucial to ensure the quality and success of your finished product. From cutting and shaping the wood to properly drying it, here are some essential tools you’ll need for the process.
Cutting Tools
One of the most essential tools for milling wood is a good quality table saw or circular saw. These tools are used to cut the wood into the desired dimensions and shapes for your woodworking project. Additionally, a band saw can be incredibly useful for more intricate cuts and shaping.
Shaping Tools
For shaping the wood, a planer and jointer are indispensable. The planer is used to create a smooth surface on the lumber while the jointer ensures that one edge is perfectly flat before moving onto final dimensioning with a planer.
Drying Equipment
In terms of equipment needed for drying wood, a kiln or air-drying setup is essential. A kiln provides controlled conditions for drying the wood quickly and efficiently, while air-drying requires proper stacking of lumber in a well-ventilated area over an extended period of time.
Moisture Measurement Tools
Lastly, moisture meters are important tools to have on hand when drying wood for woodworking projects. They allow you to accurately measure the moisture content of the wood, ensuring that it has reached an appropriate level before using it in your project.
By having these essential tools and equipment on hand, you can ensure that you are properly equipped to mill and dry wood for your woodworking projects, leading to better results and overall success in your craft.
Tips for Successful Milling and Drying
Successfully milling and drying wood is essential for any woodworking project. Without proper techniques, the finished product may be compromised due to warping, cracking, or other issues caused by insufficiently prepared wood. This section will provide valuable tips for ensuring the success of your milling and drying process, as well as common mistakes to avoid.
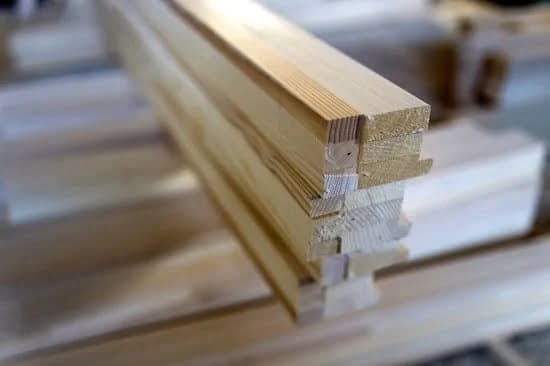
One important tip for successful milling and drying is to properly handle and store the wood after it has been cut. It is crucial to stack the lumber in a way that allows for proper air circulation to prevent mold and mildew from developing during the drying process. Additionally, using stickers between layers of lumber can help promote even drying and minimize warping.
Another best practice is to regularly monitor the moisture content of the wood during the drying process. Investing in a reliable moisture meter can provide accurate readings, allowing you to adjust your drying method if necessary. Understanding how moisture content affects the stability and integrity of the wood is key to producing high-quality woodworking pieces.
When it comes to common mistakes to avoid when milling and drying wood for woodworking, rushing through these processes can lead to costly errors. Taking the time to accurately mill the wood to your desired dimensions and then patiently allowing it to dry properly will ultimately save time in the long run by preventing potential issues down the line. Rushing through these steps can result in wasted materials and frustration when your project does not turn out as expected.
Conclusion
In conclusion, properly milling and drying wood is a crucial step in the woodworking process that cannot be overlooked. Selecting the right type of wood for your project and using the correct milling techniques are essential for achieving the desired results.
Understanding the effects of moisture content on wood and choosing the appropriate drying method can make a significant difference in the quality and durability of your finished piece. By following best practices and avoiding common mistakes, you can ensure that your woodworking projects are successful and long-lasting.
One key aspect of woodworking is understanding how to mill and dry wood effectively. By mastering these processes, you can unlock the full potential of the wood you work with, leading to superior craftsmanship. Whether you choose to air-dry or kiln-dry your wood, having a good understanding of each method’s benefits will aid you in making an informed decision to suit your specific needs.
Additionally, having access to the essential tools and equipment needed for milling and drying wood is fundamental for a smooth woodworking experience. With proper knowledge and preparation, you can embark on your projects with confidence, knowing that you have taken all necessary steps to ensure success. In summary, taking the time to learn how to mill and dry wood for woodworking will not only elevate the quality of your creations but also enhance your overall enjoyment of this fulfilling craft.
Frequently Asked Questions
What Is the Best Way to Dry Wood for Woodworking?
The best way to dry wood for woodworking is to use a kiln or air-drying method. Kiln-drying is faster and more precise, while air-drying is a natural and cost-effective option. Both methods involve removing moisture from the wood to make it more stable and less prone to warping or cracking.
How Do You Dry Wood After Milling?
After milling, wood can be dried using air-drying or kiln-drying methods. Air-drying involves stacking the lumber with spacers in between each board to allow for airflow, while kiln-drying uses a controlled environment to speed up the drying process.
Whichever method is used, it’s important to monitor the moisture content of the wood to prevent over-drying or under-drying.
How Long Does Wood Need to Dry Before Milling?
The length of time wood needs to dry before milling depends on several factors including species of wood, thickness of the lumber, and the drying method used. In general, softwoods may take several months to a year to air dry while hardwoods can take one to two years.
Kiln-drying can significantly reduce this time but still requires careful monitoring of moisture levels.

Hi everyone! I’m a woodworker and blogger, and this is my woodworking blog. In my blog, I share tips and tricks for woodworkers of all skill levels, as well as project ideas that you can try yourself.


