Woodworking enthusiasts are constantly exploring new techniques to enhance their craft, and one such technique that has gained popularity is beaded edge woodworking. This unique method involves adding a decorative bead along the edge of a piece of wood, creating a beautiful and intricate detail.
Beaded edge woodworking can be traced back to traditional furniture-making practices, where craftspeople would use specialized tools to achieve this elegant embellishment. Today, this technique continues to be cherished for its ability to elevate the design of furniture and other wooden creations.
To embark on your own beaded edge woodworking project, it’s essential to understand the history and origins of this technique, as well as the tools and materials needed for its execution. By following a step-by-step guide and learning about common mistakes to avoid, you can master the art of creating stunning beaded edges on your woodworking pieces.
History and Origins of Beaded Edge Woodworking
Beaded edge woodworking has been a popular technique for centuries, with its origins dating back to the early days of furniture making. The beaded edge, also known as a bead molding, adds a decorative touch to woodwork by creating a rounded or concave profile along the edges of furniture or cabinetry. This elegant detail can elevate the overall look of a piece and give it a more sophisticated finish.
Throughout history, beaded edge woodworking has been used in various cultures and periods of furniture design. In colonial America, craftsmen often incorporated beaded edges into their pieces as a way to showcase their craftsmanship and attention to detail. In Europe, this technique can be found in traditional furniture styles such as French Provincial, adding a touch of elegance and charm to the pieces.
To achieve a beaded edge in woodworking, craftsmen typically use specialized tools such as routers, hand planes, or even specific router bits designed for creating beads. Additionally, materials like hardwoods or softwoods are commonly used for this technique depending on the desired look and durability of the finished piece. The process of creating a beaded edge requires precision and skill to ensure that the bead is consistent in size and shape along the entire length of the edge.
- Colonial America
- European Furniture Styles
- Specialized Tools for Beaded Edge Woodworking
Tools and Materials Needed for Beaded Edge Woodworking
When it comes to creating a beaded edge in woodworking, having the right tools and materials is essential to achieving a professional-looking finish. Here is a list of items you will need to get started with beaded edge woodworking:
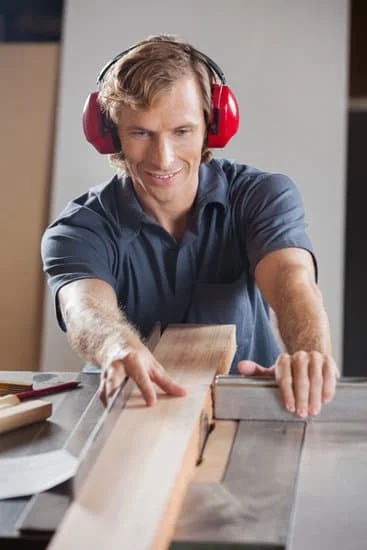
- Table saw: A table saw is one of the most crucial tools for creating a beaded edge. It allows you to make precise cuts and grooves that are necessary for this woodworking technique.
- Router: A router with a beading bit is another essential tool for creating decorative edges in woodworking. The router will help you achieve smooth and uniform beads along the edges of your project.
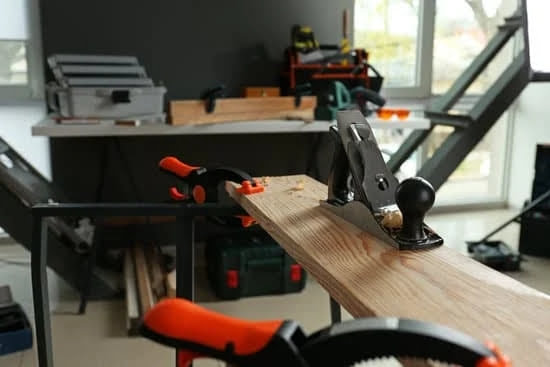
- Hand plane: A hand plane can be used to clean up any rough spots or imperfections on the wood before adding the beaded edge.
In addition to tools, you will also need some materials to complete your beaded edge woodworking project. Here are some of the supplies you will need:
- Wood: Choose a high-quality hardwood such as oak, cherry, or maple for your project. These woods are sturdy and able to hold intricate details like a beaded edge.
- Beaded molding: You can either purchase pre-made beaded molding from a hardware store or create your own using a router and a custom bit.
- Sandpaper: Sandpaper of various grits will help smooth out the wood surface before and after adding the beaded edge.
By having these tools and materials on hand, you’ll be well-equipped to start incorporating beautiful beaded edges into your woodworking projects. With practice and patience, you can master this technique and bring an elegant touch to your creations.
Step-by-Step Guide on How to Create a Beaded Edge
Beaded edge woodworking is a technique that adds a decorative and elegant touch to woodworking projects. Creating a beaded edge involves shaping a small rounded profile along the edges of wood, adding depth and visual interest to the piece. The process requires precision and attention to detail, but the results can truly elevate a project.
To create a beaded edge, you will need a few key tools and materials. Firstly, you will need a router with a beading bit or a scratch stock tool to carve out the bead. Additionally, having clamps to secure your workpiece, sandpaper for finishing touches, and protective gear such as goggles and gloves are essential for safety.
The first step in creating a beaded edge is marking the width of the bead on all edges of your wood piece. Then, using your preferred tool (router or scratch stock), carefully carve out the bead along each edge. Take your time and maintain consistency in depth and pressure to achieve an even bead around the entire piece. Once the beads are carved out, use sandpaper to smooth any rough edges and ensure a clean finish.
Common Mistakes to Avoid When Doing Beaded Edge Woodworking
When it comes to beaded edge woodworking, there are some common mistakes that beginners and even seasoned woodworkers can make. These mistakes can affect the overall quality and look of the finished product, so it’s important to be aware of them and know how to avoid them.
Incorrect Measurement
One of the most common mistakes in beaded edge woodworking is incorrect measurement. Whether it’s measuring the width of the bead itself or the distance between beads, precision is key in creating a seamless and professional-looking beaded edge. Using a tape measure or a combination square can help ensure accurate measurements are taken before making any cuts.
Improper Tool Usage
Another mistake to avoid is using the wrong tools for the job. Beaded edge woodworking requires specific tools like a beading plane or router with a beading bit to create those distinctive rounded edges. Using improper tools can result in uneven and messy beads, compromising the overall look of your project. Make sure to invest in quality tools specifically designed for creating beaded edges.
Rushing Through the Process
Lastly, rushing through the process is a common mistake that many woodworkers make when attempting beaded edge woodworking. Taking your time and paying attention to detail is crucial in achieving a flawless finish. Rushing can lead to sloppy workmanship and mistakes that may not be easily fixable. Remember, patience is key when it comes to creating beautiful beaded edges on your woodworking projects.
Tips and Tricks for Achieving a Perfect Beaded Edge
When it comes to achieving a perfect beaded edge in woodworking, attention to detail and precision are key. Here are some tips and tricks to help you master the art of creating beautiful beaded edges on your woodworking projects.
One important tip for achieving a perfect beaded edge is to use the right tools. A molding plane or beading tool specifically designed for creating beads can make all the difference in achieving clean, crisp edges. Additionally, ensuring that your tools are sharp and properly maintained will help you achieve smooth and precise results.
Another important aspect to consider is the wood itself. Choosing the right type of wood with a straight grain will make it easier to create a clean and uniform bead. Softwoods like pine or cedar are great options for beginners, as they are easier to work with than hardwoods.
Furthermore, taking your time and working slowly and methodically will help you achieve a flawless beaded edge. Rushing through the process can result in mistakes or inconsistencies in the bead. Practice on scrap pieces of wood before attempting it on your actual project to gain confidence and refine your technique. Remember, patience is key when it comes to mastering any woodworking technique, especially creating a beaded edge.
Different Variations and Styles of Beaded Edge Woodworking
Traditional Beaded Edge
One of the most classic styles of beaded edge woodworking is the traditional beaded edge. This style features a simple, rounded bead along the edge of the wood, adding a touch of elegance and sophistication to any project. The traditional beaded edge is perfect for adding a subtle decorative element without being too overwhelming.
Rustic Beaded Edge
For those looking for a more rustic or country-inspired look, the rustic beaded edge is a great option. This style typically features a more pronounced bead with a rougher texture, giving off a more natural and weathered appearance. The rustic beaded edge is perfect for enhancing the charm and character of furniture pieces or home decor items.
Modern Beaded Edge
If you prefer a clean and sleek design, the modern beaded edge may be more suitable for your taste. This style often involves integrating the bead into the overall design in a more subtle and streamlined way. The modern beaded edge can add a contemporary touch to your woodworking projects while still maintaining the timeless appeal of this technique.
When deciding on which variation and style of beaded edge woodworking to use for your project, consider the overall aesthetic you want to achieve. Whether you opt for traditional, rustic, or modern, incorporating a beaded edge can elevate your woodworking creations to new levels of craftsmanship and beauty.
Projects and Ideas for Incorporating Beaded Edge Woodworking Into Your Designs
When it comes to incorporating beaded edge woodworking into your designs, the possibilities are endless. One idea is to create a beautiful beaded edge on a picture frame to add a touch of elegance and style. This simple yet effective technique can elevate the look of any frame and make it stand out as a unique piece of art in your home.
Another interesting project idea is to use beaded edge woodworking on cabinet doors or drawers. By adding a beaded edge detail to these pieces of furniture, you can instantly transform them into stunning focal points in any room. Whether you choose to paint or stain the wood, the beaded edge will enhance the overall look and feel of the cabinets, giving them a custom-made appearance.
For those looking to add a personalized touch to their furniture, consider incorporating beaded edge woodworking into table edges or chair rails. By using this technique, you can create intricate designs that showcase your craftsmanship and attention to detail. Whether you prefer a simple beaded edge or a more elaborate pattern, the end result will undoubtedly impress anyone who sees it.
| Project Ideas | Description |
|---|---|
| Picture Frame | Add a touch of elegance by creating a beaded edge on a picture frame. |
| Cabinet Doors/Drawers | Elevate your furniture by adding a beaded edge detail to cabinet doors or drawers. |
| Table Edges/Chair Rails | Personalize your furniture with intricate designs using beaded edge woodworking. |
Conclusion
Beaded edge woodworking is a timeless technique that adds a touch of elegance and sophistication to any woodworking project. The process of creating a beaded edge involves using specialized tools and skills to craft delicate, decorative edges on wood surfaces. From its historical roots to modern-day applications, beaded edge woodworking continues to captivate woodworkers with its beauty and versatility.
One of the key aspects that sets beaded edge woodworking apart is the attention to detail required in creating intricate designs. By incorporating a beaded edge into your woodworking projects, you can elevate the aesthetic appeal and create a unique focal point that showcases your craftsmanship and dedication to your craft. Whether you are working on furniture, cabinetry, or decorative items, the addition of a beaded edge can truly make a piece stand out.
In conclusion, beaded edge woodworking is not just a technique – it is an art form that allows woodworkers to unleash their creativity and explore new design possibilities. With the right tools, materials, and techniques, anyone can learn how to create stunning beaded edges that enhance the beauty and functionality of their woodworking projects.
So why not try your hand at incorporating a beaded edge into your next creation? You may just discover a newfound passion for this intricate and captivating woodworking style.

Hi everyone! I’m a woodworker and blogger, and this is my woodworking blog. In my blog, I share tips and tricks for woodworkers of all skill levels, as well as project ideas that you can try yourself.


