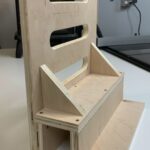
Introduction to Woodworking Console Table
Woodworking Console Tables have been around for centuries, originally appearing in the 16th century in France and Italy. They have traditionally been used as a decorative piece of furniture with the purpose of displaying decorations or objects. And providing extra tabletop space in the hallway or entryway of a home.
The console table was very popular during the Baroque period and has become an artifact mostly associated with traditional decor schemes. The concept behind this furniture is that it displays beauty and utility to suit any occasion or style both indoors and outdoors. Today, they come in various shapes and sizes, depending on what type of décor one desires.
Depending on its construction, a woodworking console table typically has an open back within which items can be stowed away for storage purposes. Such tables may also comprise drawers – often containing shawls wearing accessories – as well as bookshelves for users to display their collections. There are also those with decorative embellishments such as shell decorations and carved armrests that add extra visual appeal to any room. Various materials are used to make this type of furniture from hardwoods like oak, walnut, maple or cherry to softer woods such as pine or fir.
Types of Wood Used in Console Tables
When choosing a wood type for a console table, it is important to consider the type of wood and its strength. There are two main categories of woods used in console tables: hardwoods and softwoods.
Hardwoods are generally preferred for console tables due to their durability. Examples of hardwoods used in furniture construction include oak, maple, mahogany, cherry, walnut and teak. These woods offer superior strength and resilience, making them an ideal choice for tables that will be receiving frequent use or heavier items placed on them. Hardwood tables also tend to last longer than their softwood counterparts.
Softwoods can also be used to create console tables; however they are not as strong as hardwoods so they may require additional structural support if heavier objects need to be placed on the table. Pine, cedar, redwood, larch, spruce and fir are all examples of common softwoods used in furniture construction. Softwood tables can be more cost effective than hardwood options but this should be considered alongside the durability of each type when deciding what material is best suited for your table needs.
Process of Building a Console Table
Building a console table can be an exciting and rewarding DIY project. Constructing a piece of furniture from scratch is an opportunity to create something beautiful that is both functional and customized to fit your own personal style. A console table is a narrow, long-legged table that typically sits behind a couch or in an entryway, making it an ideal addition to any home.
Building a console table starts with choosing the lumber for the top and legs of the piece. You will need four strong boards for the tabletop, two for legs, and one board for support. Cut each board to size using a jigsaw or handsaw. Then sand down any rough edges with cinder blocks or steel wool.
Next attach the four boards together with wood glue and then clamp them together while they dry overnight. Once the glue has completely dried you can use your drills with screws to further secure the boards together in order to create a sturdy surface for your console table top.
To build the legs you will need two thicker boards cut into rectangles of equal length. Attach these rectangles at each corner of your tabletop using wood screws, making sure all joints are level using carpenters squares and drill bit extenders if needed. The final step is attaching the center support board underneath your construction which helps increase stability so that when sitting on either end of your new console table it won’t rock or wobble!
Once all pieces are attached you can finish off your console table by staining or painting it to match your existing decor ” there are many techniques you can use depending on what look you would like to achieve!
Here’s a helpful video illustrating how to build your own unique custom console table: https://www.youtube.com/watch?v=mos_W8KuCNs
Different Styles of Console Tables
Modern Console Table: A modern console table often features clean lines and stark minimalism. It is typically characterized by a more open, airy design with few ornamentations or decorations. This style of table is perfect for contemporary styled homes, as it adds a sense of vibrancy and sophistication to any room.
Industrial Console Table: An industrial console table often has an unfinished wood surface combined with steel accents to create an aged look and feel. This unique style is ideal for creating an urban, rustic feel in your home. It pairs well with exposed brick walls and weathered furniture pieces that give the space a funky, eclectic style.
Contemporary Console Table: Contemporary console tables typically feature straight edges and simple silhouettes, making them great for contemporary themed homes. They are often constructed with materials such as glass, metal, or even plastic, giving them a modern flair that would be perfect for living rooms or hallways.
Traditional Console Table: Traditional console tables usually have ornate curves and exquisite carvings on their surfaces and legs. Crafted from materials like cherry or mahogany wood, these tables add elegance to traditional themed homes such as manors or castles. Their classic design would also make them suitable for formal dining rooms or libraries.
Finishing and Detailing Techniques
1. Using a circular saw to outline the shape of the console table such as its edges and legs.
2. Using a jigsaw to cut out intricate patterns in the top surface of the table, like vines or geometric shapes to add texture and detail.
3. Using a CNC router to create intricate shapes in hollows and concavities that would be difficult to do with a traditional manual saw or jigsaw tool.
4. Utilizing sanders, chisels and other hand tools to smooth out any rough edges present on the table before it is stained or varnished.
5. Staining or painting the wood with different colors/shades and/or utilizing wood stains/dyes that bring out grain patterns and textures of the wood being used for the console table, creating depth and character once dried.
6. Applying several coats of polyurethane or varnish overtop of painted surfaces for protection from daily wear-and-tear and giving the wood an overall polished finish that can be either glossy or matte in appearance depending on preference at time of application (note: use painters tape to ensure exact line detail for separating two colors during varnishing).
7. Install hardware like handles, hinges and drawer pulls onto finished console tables to achieve desired aesthetic look – this is typically done after final finishing techniques are applied so any extra dust/debris can easily be swept up away from these newly added fixtures
Care and Maintenance Tips
• Make sure to use coasters and place mats when setting items down on the console table’s surface.
• Dust the table frequently with a soft cloth to keep it free of dirt and debris.
• Apply a clear, penetrating finish such as Danish oil or beeswax to protect the wood from damage over time.
• Keep away from direct heat sources, such as radiators and fireplaces.
• Avoid excessive moisture exposure to prevent warping or splitting.
• Check the bolts and screws once in a while to make sure they remain secure.
• Clean spills immediately to avoid potential staining or discoloration of the wood surface.
Tips for Shopping for Console Tables
When shopping for a console table, it is important to take the time to inspect its quality and materials. A good quality console table should have solid construction made from sturdy, non-toxic woods such as maple and pine or other hardwoods like oak and cherry. Wood parts should be dovetailed or reinforced with screws or bolts, not just nailed. Look for smooth joints between wood components that are relatively seamless with no gaps.
The finish of the console table should be smooth, even and without any drips or runs. Carefully inspect the stain or paint applied, making sure that coverage is even throughout all surfaces of the table. Pay attention to details in craftsmanship that may indicate higher quality such as routed edges, decorative turnings, ornamental inlays or carving. The presence of these indicates that care was taken by skilled artisans in constructing the furniture piece. The bottom line is if quality has been put into how a console table looks and how it has been constructed then you can feel comfortable with your purchase knowing that you are buying something that was built to last.
Conclusion
If you have enjoyed creating a woodworking console table, there are plenty of other projects to try. For instance, build a small side table with shelves or drawers for storage, or try designing and building an outdoor bench to outfit your garden. You could also construct a kitchen island that doubles as a breakfast bar. If you prefer larger-scale works, why not create custom cabinetry for your living room? And if you need something truly unique, then make a winemaker’s cabinet to store and display bottles of wine in style. With a bit of creativity, the possibilities are endless!

Hi everyone! I’m a woodworker and blogger, and this is my woodworking blog. In my blog, I share tips and tricks for woodworkers of all skill levels, as well as project ideas that you can try yourself.


