Introduction
The world of woodworking is an exciting and rewarding endeavor. Working with wood involves a variety of different skills and techniques, each of which has its own unique terminology. To help you better understand the language and concepts associated with woodworking, this article will explain some of the common terms used in the industry while providing examples using images. Whether you are just starting out or an experienced craftsman, understanding the basics of woodworking terminology is essential to effectively communicate ideas and execute projects accurately. Knowing these words will also give you a deeper appreciation for the artistry that goes into turning a piece of wood into something beautiful. Some key terms to know include types of joinery such as dovetailing, dowel jointing, mortise-and-tenon joints, biscuit jointing; cutting techniques such as crosscutting, ripping, planing; finishing techniques such as staining, sanding and varnishing; and materials such as veneer or plywood. With this knowledge in hand, you’ll be ready to start crafting whatever project you can dream up!
People & Roles in Woodworking
Woodworking involves an array of individuals with different roles and responsibilities. The most important individual in woodworking is the woodworker themselves. They are the ones orchestrating all aspects of the project, from design to execution. Other essential members of a woodworking team include carpenters, joiners, craftspeople, lumberjacks, and sawyers. Carpenters generally work onsite and specialize in constructing physical wooden components or installations from either raw materials or pre-made parts. Joiners are specialists in installation such as window frames, doorways and stairs. Craftspeople create unique pieces of furniture or decor using traditional woodworking techniques like carving and turning. Lumberjacks provide the raw materials for projects by felling trees and milling lumber using large saws called bandsaws. Sawyers use smaller more detailed saws like jigsaws to make precision cuts into wooden parts. Each player plays an integral role in a successful project which requires the collaboration of many different professionals to get the job done right.
Tools of the Trade
When it comes to woodworking, the tools you use have a direct influence on the quality of your projects. That’s why it pays to familiarize yourself with the terminology associated with carpentry and woodworking tools. Knowing what each tool is used for will help you choose the right ones for whatever project you’re undertaking.
Here are some of the major tools you may encounter in a woodworking shop:
Saw ” A saw is a cutting instrument that uses a thin sheet of hardened steel or carbide-tipped blade held in tension between two handles to slice through or trim material such as wood, metal or plastic. Depending on its size and design, a saw can be used for various tasks, such as cutting intricate patterns or creating straight cuts. Examples include handsaws, jigsaw, hacksaw and miter saws.
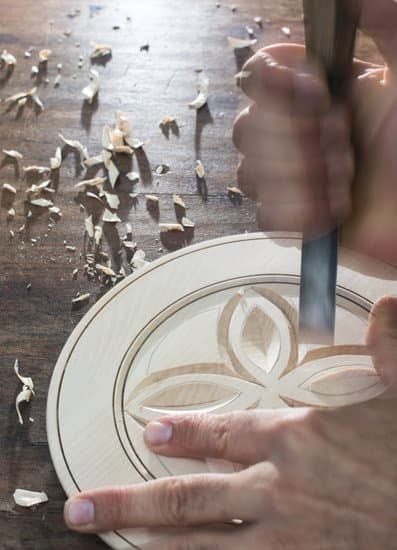
Chisel ” A chisel is a hand-held tool designed for slicing away at surfaces such as wood, stone or metal to create channels or grooves for joining pieces together. It features a beveled cutting edge at an angle which works by chipping away at surfaces with hammering impacts from its opposite end.
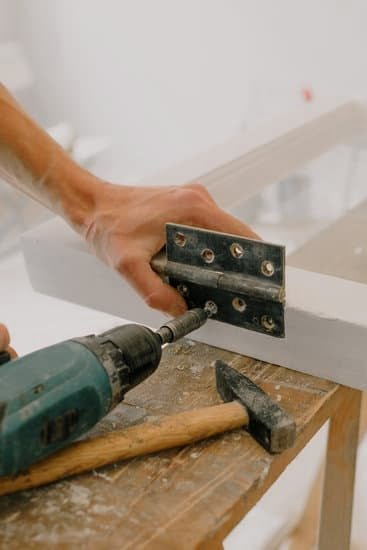
Drill ” While most people are familiar with drills in general, there are several types specifically designed for working with materials like metals and woods. These types usually involve thinner drill bits made of cobalt steel or carbide tips which allow them to cut through harder materials than traditional drills.
Router – An electrical device, routers feature three main components: an electric motor that turns a spindle, an arbor that fits accessories like drill bits into the spindle and a housing where these all parts come together. Routers can shape edges by cutting away material from specific areas while leaving others untouched and are available in many different sizes depending on their intended application.
Clamps ” Clamps are useful devices used to secure two pieces of material together while allowing them to move independently of one another when needed. They range in style depending on the application; but common types include G-clamps, C-clamps and F-clamps which tend to feature adjustable screw mechanisms that allow them to be tightened around objects of various shapes and sizes securely without causing damage.
Basic Woodworking Techniques
1. Sanding: Sanding is the process of using sandpaper or a power sander to smooth and even out the surface of wood, making it a great finishing tool for any project. Visualize taking off thin layers of materials in a controlled manner until the desired level of finish is achieved.
2. Joinery: Joinery encompasses many different techniques that are used to construct strong and beautiful woodworking projects. From mortise-and-tenon joints to dovetails, each technique has its own unique benefits and uses which require different tools and skill levels.
3. Routing: Routing is an important woodworking technique that should never be overlooked when creating furniture or cabinets. It involves cutting channels into pieces of material in order to create decorative edges or cut out patterns with a router machine. Common routers include plunge router, trim routers, laminate trimmers, jigsaws and biscuit joiners.
4. Drill Press: A drill press (also known as pedestal drill) is a key tool for many common drilling tasks such as drilling holes for screws and bolts, reaming pipes and countersinking pilot holes for larger objects. Boasting greater accuracy than manual drills, they can also be used on more complex components requiring precision measurements such as kitchen countertops or intricate furniture pieces.
5. Measuring Tools: Accurate measuring tools are essential in any woodworking project; top quality tape measures, spirit levels, calipers and protractors will ensure your work is precise and accurate every time, yielding excellent results you can be proud of displaying in your home or office space!
Working with Different Woods
Woodworking is an exciting and rewarding hobby, but it can be tricky if you don’t know some of the terminology. Here is an introduction to some commonly-used woodworking terms, along with pictures to help differentiate them:
Grain ” Grain is the direction of the lines that appear running through a piece of wood when it’s cut perpendicular to its long axis. This will usually have a definite orientation which should be taken into account when positioning a joint or making other decisions. There are three main types of grain ” end grain (running along the ends of a board), edge grain (across the sides) and surface grain (on the top).
Figure: The various grains in wood are illustrated in this figure, with arrows pointing in each direction they run. End grain runs up and down, edge grain runs side-to-side, and surface grain runs length-wise.
Knothole ” Knotholes are small holes in the surface of a piece of wood that form over time as part of natural wear and tear. These defects are unavoidable, however they can add character to your project if used well.
Figure: This picture illustrates what a knothole looks like in wood. It appears as an irregular hole in the surface with crevices around its perimeter due to natural wear and tear over time.
Dowel ” A dowel is a cylindrical rod which can be inserted into pre-drilled holes in two pieces of wood for added strength when joining them together with glue or screws. Dowels come in many different sizes and materials such as hardwood or plastic.
Figure: This figure shows how dowels fit into two pieces of wood with pre-drilled holes along their length, creating an incredibly strong bond between them without using any additional screws or adhesives.
Finishing Touches
Finishing touches is the final step in creating your perfect project with a lasting finish. Finishing touches can come in many forms, including applying a sealer or wax to protect the wood, putting on coatings such as lacquer and varnish to give it a beautiful shine, or adding stain or dye to bring out the natural beauty of your project.
When choosing to put on a coating, it is important to select one that will provide you with protection against moisture, UV rays, and wear-and-tear. Additionally, using different types of sandpaper can help add texture and smoothness to your piece for greater presentation. Applying appropriate amounts of thinners and hardeners can ensure an even application of polish or lacquer and keep it from flaking off.
For added texture and visual appeal, wood carving techniques such as pyrography (wood burning) and routing (cutting out shapes) can be used. Special finishes like crackle paint techniques are also available for the artist who wants to get more creative with their projects. Finally, buffing with waxes brings out the luster of your work by providing another layer of protection while giving it a brilliant shine. With these finishing touches you can create something truly unique that is sure to last for years!
Important Terms & Definitions
Butt Joint: A butt joint is a basic woodworking joint in which two pieces of wood are joined by aligning their ends, or “butts”, together. It is the simplest type of joint and one of the most common woodworking techniques. To create a butt joint, a considerable amount of force may be needed to join the two pieces firmly. As a result, the strength of this type of joinery depends largely on the quality and thickness of the glued surface.
Miter Joint: A miter joint is an angled cut that allows two pieces of wood to meet at an angle. This type of joinery can be used for frames, moldings, window sashes and decorative displays. Typically accomplished with precise angles (45 degrees), miter joints require precise measurements and cutting angles as they are less forgiving than other types or joints. Strength can be increased by using metal fasteners or dowels to supplement adhesive glue used to assemble the mate pieces.
Benefits
The benefits of woodworking are many. From the satisfaction of creating a tangible product from scratch, to the therapeutic and calming effects of working with your hands, woodworking has much to offer. You can express yourself through carving, building furniture or assembling something that will last for generations. Working with wood engages multiple senses, making it an interesting and immersive activity that can improve concentration and boost self-esteem. Woodworking teaches patience and can even help develop motor skills as you make cuts and join pieces together. Additionally, learning more about the types of wood, their grains, textures and behaviour when worked can be a fascinating subject in itself. It’s also incredibly satisfying to finish a project you’ve been working on for weeks or months at a time; the sense of accomplishment is hard to beat! Finally, whether you’re making something out of necessity or just for fun, it’s an activity that doesn’t cost much upfront and can reap long-term rewards ” taking pride in something you have made with your own two hands is truly priceless.
Resources
Woodworking terminology can often seem intimidating, but with a little research it’s easy to gain some knowledge on the subject. Here are some of the main terms that come up in woodworking paired with pictures of what they mean:
Miter Joint: This joint is often used to join two boards at an angle. Picture an internal corner of a picture frame”the joint which forms this corner would be a miter joint.
Rabbet Joint: A rabbet joint is used when a board edge meets the end grain of another piece. Picture bookshelves where the shelf slots into a groove (rabbet).
Lap Joint: A lap joint is formed by overlapping two pieces perpendicularly so that the longer piece has a portion chopped out where it intersects with the shorter piece. Picture two boards crossing each other to form an X or + shape; this is an example of a lap joint.
Dado Joint: A dado joint joins two pieces by cutting into one board multiple times and slipping the other board into these cuts for support. This can be easily done with a router or table saw. The pieces connected form shelves, drawers, and tables. Picture some drawers in your kitchen cabinet; if they connect along their widths then they’re connected with dado joints!
Tongue & Groove Joinery: Tongue and groove joinery ensures alignment by placing one board’s projection called ‘tongue’ into another board’s slot called ‘groove’. The tongue secures itself firmly in place making strong connections between boards. Picture the connection between floorboards – that’s exactly how tongue and groove works!
Biscuit Joiner: Biscuit stationing is an excellent option for hobbyists who don’t own complex machinery such as biscuit joiners. These tools send cylindrical biscuits into matching slots on either side of the wood structure connection strip which then swells due to absorption of moisture coming from glue applied to both sides joining the pieces together forming solid joints with enhanced strength compared to basic butt joints joining only one side using glue alone without biscuits for hold enhancement purpose. Picture almost any kind of furniture ” chances are it was constructed using biscuit joinery!
Pictures
Picture 1: Saw ” A saw is an implement used to cut material into a desired shape. They make straight cuts, curved cuts, and angled cuts. Depending on the type of saw being used, the blade can also be changed out to create different shapes and sizes.
Picture 2: Chisel ” A chisel is a hand tool used for cutting and shaping wood or stone. It typically has a sharpened bit at one end and a flat or tapered heel at the other end that can be struck with a hammer or mallet in order to chip away materials at various depths.
Picture 3: Router ” A router is an electric woodworking tool that removes material from wood by spinning a round cutting tool (called a bit) around an axle at high speeds. Routers are primarily used for cutting dadoes, grooves, patterns, trimming edges, and even carving wooden sculptures or engravings.
Picture 4: Planer ” A planer is an electric power tool commonly used in woodworking that machines flat surfaces with two blades traveling along parallel tracks above a baseboard. As the blades rotate they shave off parts of the board leaving it momentarily slightly thinner than before. The blades then reverse direction and travel back up which helps the board achieve its intended thickness more quickly and evenly than when done by hand-sanding techniques alone.

Hi everyone! I’m a woodworker and blogger, and this is my woodworking blog. In my blog, I share tips and tricks for woodworkers of all skill levels, as well as project ideas that you can try yourself.


